How to Clean Tile Before Sealing for Lasting Results
A sealer can protect clean grout, but it cannot fix dirt, soap film, grease, or mineral buildup trapped underneath it. When you clean tile before sealing, you are preparing the surface for protection that lasts instead of locking in discoloration. This step matters in busy Orlando kitchens, bathrooms, entryways, showers, rentals, and commercial spaces where moisture and daily traffic quickly expose weak prep work.
A floor may look reasonably clean after mopping and still be far from ready for sealer. Grout is porous, and its tiny openings hold embedded soil that ordinary household cleaners often leave behind. The same is true for textured tile, natural stone, and shower walls with stubborn residue. Proper cleaning gives the sealer a clean, dry surface to bond with, which helps grout resist future staining and makes regular maintenance much easier.
Why You Must Clean Tile Before Sealing
Sealer works by filling or protecting the porous areas of grout and certain tile materials. If those pores contain cooking grease, body oils, soap scum, hard-water minerals, mildew staining, or old cleaner residue, the sealer may not penetrate evenly. The result can be blotchy-looking grout, poor water resistance, and stains that seem to return right after the job is finished.
There is another concern: residue on the face of the tile. A haze left by soaps, waxy mop products, or an incompatible cleaner can interfere with the finished appearance. On some surfaces, it may even make the floor feel tacky or slippery. Thorough preparation is not an extra step. It is the foundation of a good sealing job.
In Central Florida, humidity adds to the challenge. Bathrooms and showers can stay damp longer, while hard water can leave mineral deposits around fixtures and along shower floors. Kitchen grout often holds oils that spread farther than they appear to. A quick spray-and-wipe method rarely reaches deep enough to solve either problem.
Start by Identifying What Needs Sealing
Not every tile surface should be sealed, and not every surface needs the same cleaning method. Most ceramic and porcelain tile has a glazed, nonporous face that does not require sealer. The grout lines between those tiles usually do. Unglazed porcelain, quarry tile, saltillo, travertine, marble, limestone, slate, and other natural stone may be porous enough to need protection, but each material requires a compatible cleaner and sealer.
This is where a one-size-fits-all product can create problems. Acidic cleaners may damage or dull calcium-based stone such as travertine, marble, and limestone. Harsh abrasives can scratch polished surfaces. Strong alkaline degreasers can be useful in a kitchen or restaurant setting, but they need to be selected carefully and fully removed before sealing.
If you are not sure whether your tile is glazed, natural stone, or another specialty material, start with a small hidden area or ask a professional. Protecting the wrong surface with the wrong product can be more costly than leaving it alone until you have the right answer.
The Right Process to Clean Tile Before Sealing
Begin by removing loose grit, dust, pet hair, and debris with a vacuum or dry microfiber mop. Skipping this step can turn damp cleaning into a gritty slurry that spreads across the floor and settles into grout lines.
Next, choose a cleaner based on the soil and the material. A neutral pH tile and stone cleaner is a safe choice for routine cleaning and sensitive surfaces. For heavy kitchen grease, a professional-grade alkaline cleaner may be appropriate. For soap scum and hard-water buildup in a ceramic or porcelain shower, a targeted product can help break down mineral deposits. Always follow label directions and avoid mixing cleaning chemicals.
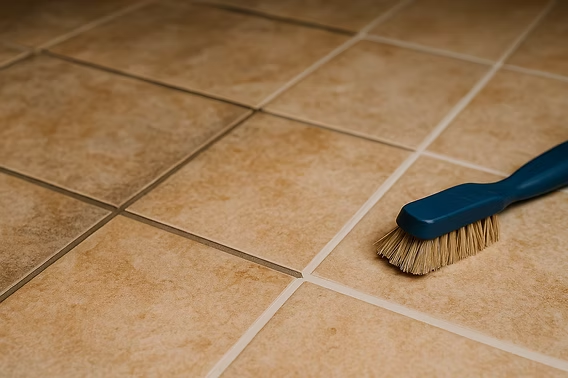
Allow the cleaner enough dwell time to loosen the soil. Scrubbing immediately after spraying often means the product has not had time to work. Keep the area controlled and avoid letting cleaner dry on the surface. Then agitate the grout lines with a grout brush or a stiff nylon brush. A brush is useful for small areas, but it has limits when grime is deeply embedded or the floor is large.
The most overlooked part of the process is extraction. Dirty cleaning solution must be removed, not simply pushed around with a mop. Rinse thoroughly with clean water and use wet extraction, clean towels, or a wet vacuum to pull away the loosened soil. Repeat as needed until the rinse water is clear and there is no cleaner film left behind.
For heavily soiled grout, professional steam cleaning and high-pressure extraction can make a major difference. Heat, pressure, specialized solutions, and immediate extraction flush soil from below the grout surface rather than leaving it in place. This is especially useful for textured tile, shower floors, rental turnovers, restaurant kitchens, and high-traffic commercial flooring.
Deal With Stains Before You Seal
Cleaning and stain removal are related, but they are not always the same job. Rust stains, dye transfer, pet accidents, mildew discoloration, paint, and deeply absorbed oils may need specific treatment. Sealing over these areas will not make them disappear.
Older grout can also be permanently discolored or worn down. In those cases, grout color sealing may be a better option than applying a clear sealer. A color seal restores a more uniform appearance while creating a protective barrier over the grout. Cracked, missing, or crumbling grout should be repaired first, since sealer cannot rebuild damaged joints.
Let the Tile and Grout Dry Completely
Clean grout must be dry before sealer is applied. Moisture left inside porous grout can reduce penetration and lead to uneven results. Drying time depends on humidity, airflow, material type, how much water was used, and whether the area is a floor, shower, or wall.
For many residential floors, waiting 24 hours after thorough cleaning is a reasonable baseline. A shower, natural stone surface, or heavily saturated grout may need 48 hours or longer. Good airflow helps. Run exhaust fans, open doors when practical, and avoid using the area while it dries.
Do not judge dryness only by the tile surface. Tile may feel dry while the grout beneath it still holds moisture. If there is any doubt, give it more time. Rushing this stage can waste both the cleaning effort and the cost of the sealer.
Apply the Sealer Carefully
Once the surface is clean and dry, apply a penetrating grout sealer according to the manufacturer’s directions. Work in manageable sections and keep the sealer where it belongs – on the grout lines or approved porous tile. Wipe excess product from glazed tile faces promptly so it does not dry into a haze.
Some grout needs more than one coat, particularly if it is older or highly porous. The goal is even coverage, not puddles of product. After the recommended curing time, test a small area by placing a few drops of water on the grout. Properly protected grout should cause water to bead rather than soak in quickly.
A sealer reduces staining and moisture absorption, but it does not make grout maintenance-free. Spills should still be wiped up, shower walls should be rinsed after use, and floors should be cleaned with products appropriate for the material. Avoid oily or wax-based mop products that leave a film and attract more dirt.
When Professional Cleaning Is the Better Value
DIY cleaning can work well for newer tile with light soil and accessible grout lines. Professional service becomes the practical choice when the floor still looks dirty after mopping, grout has dark traffic patterns, shower buildup keeps returning, or you are preparing a large area for sealing. It is also a smart choice for natural stone, commercial flooring, and properties where inconsistent results create a poor impression.
Dream Clean Orlando uses truck-mounted steam-cleaning equipment, high-pressure extraction, and surface-appropriate solutions to remove embedded soil before protective sealing. That process helps homeowners, landlords, and facility managers protect the appearance and service life of tile without jumping straight to replacement.
Before sealing, take the time to get the surface truly clean, dry, and ready. The difference shows up not only on sealing day, but in every easier cleanup that follows.